
Recently we found out that we could not update the NetScaler to the latest build of the 13.0 firmware version if the customer was also using the Citrix Workspace App account to log in to the Citrix portal. Any version higher than 13.0-84.11 in the 13.0 branch, will break the log in process for the Workspace App.
Note: If you upgrade the NetScaler using the 13.1 branch, it will still work without the use of nFactor. Keep in mind that Citrix ADC Classic Policies are officially removed from ADC 13.1, and you need to convert to Advanced Policies before upgrading to 13.1.
In this post, I will configure NetScaler nFactor Authentication to simplify the onboarding of Azure MFA Authentication via the NPS Extension.
Tip! if you still need to set up an NPS server, you can find a nice post here from Christiaan Brinkhoff.
Configuring NetScaler nFactor Authentication
- Go to Security > AAA – Application Traffic > Virtual Servers
- Click on Add to create a Authentication Virtual Server
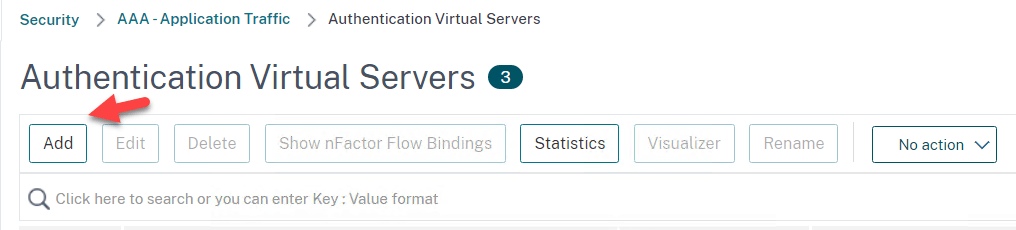
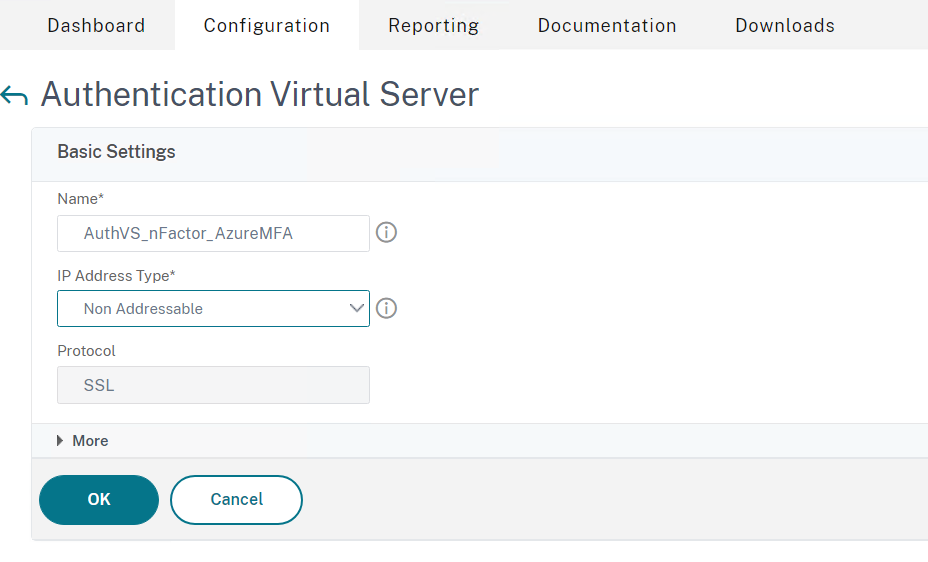
- Create a name for example: AuthVS_nFactor_AzureMFA
- Set the IP Address Type to Non Addressable
- Click on OK
- Now you need to bind a certificate, in most scenarios, this will be the wildcard certificate already configured on the gateway
- Click on Select Server Certificate and Bind the certificate
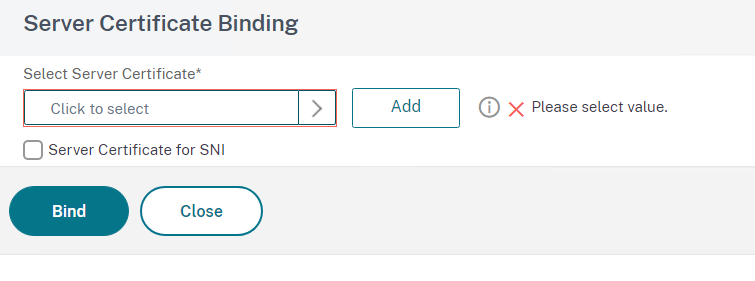
- Once the certificate is bound, you can skip any additional steps for now, just click Done at the bottom
Add LDAP and RADIUS Authentication Server Profile
- Go to Security > AAA – Application Traffic > Policies > Authentication > Advanced Policies > Authentication Policies
- Click on Add to create an ldap authentication policy
- Create a name for example ldaps_auth_AzureMFA
- In this case, we have LDAP load-balanced, so we will select the lbvip for ldap
- Type ns_true in the Expression field (from version 13.1, the classic expressions will change to “True”)

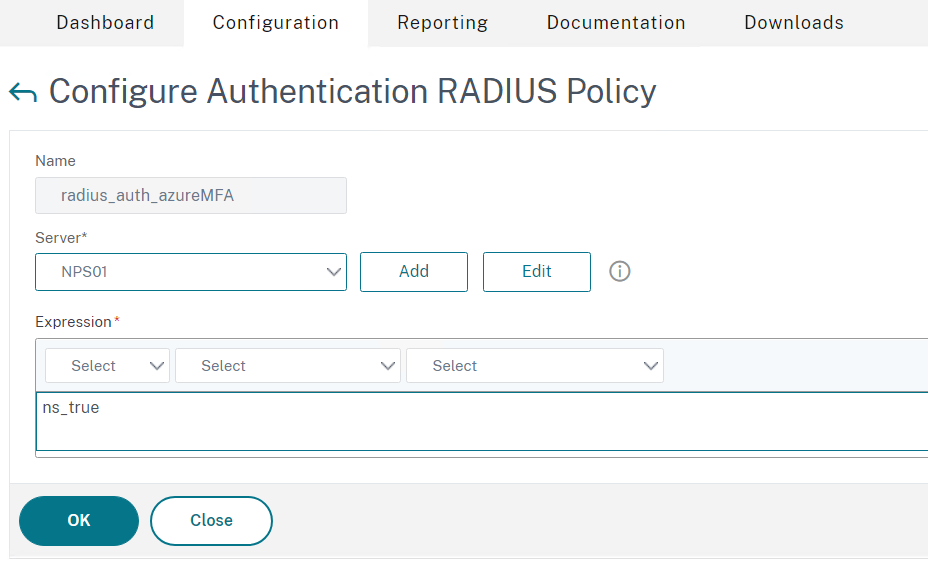
- Now we need to repeat the steps for radius
- Go to Security > AAA – Application Traffic > Policies > Authentication > Advanced Policies > Authentication Policies
- Click on Add to create an radius authentication policy
- Create a name for example radius_auth_AzureMFA
- In this case radius is not load balanced, so I will select the NPS server
- Type ns_true in the Expression field (from version 13.1, the classic expressions will change to “True”)
Authentication Login Schema Profile and Policy
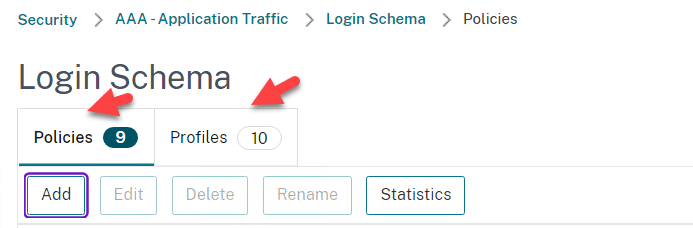
- Go to Security > AAA – Application Traffic > Login SchemaPolicies
- Click on Add to create an Authentication Login Schema Policy
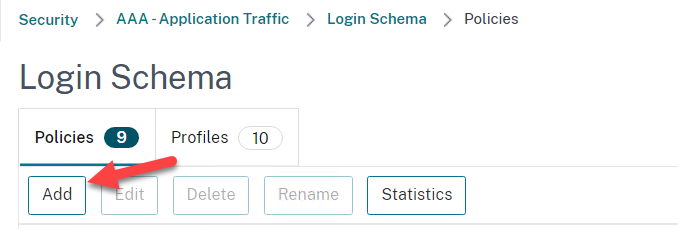
- Create a name for example SingleAuth_AzureMFA
- Click on Add to create an configure Login Schema Profile
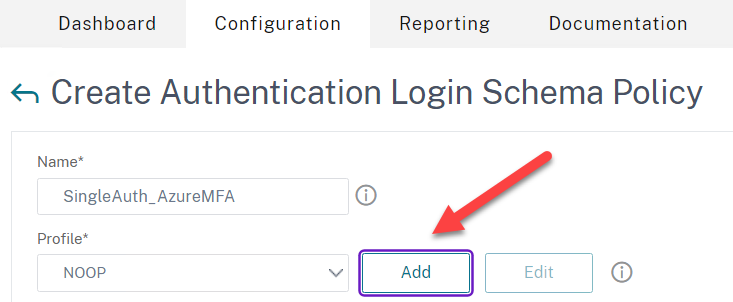
- Now select the SingleAuth.xml and click on Edit

- You can edit the labels if you like
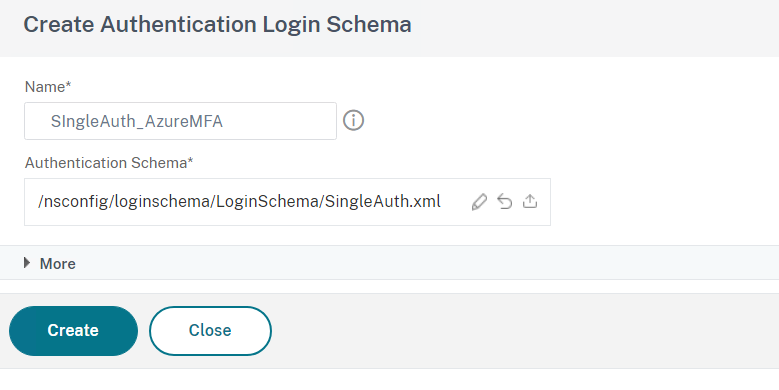
- Also create a name for example SingleAuth_AzureMFA
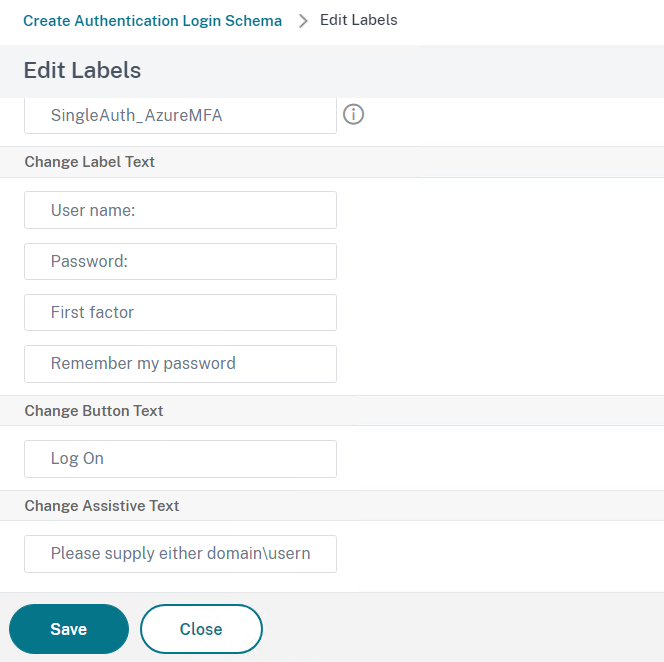
- Click on Save
- Click on Select to select the profile

- Click on Create
- Type True in the Rule field and click on OK
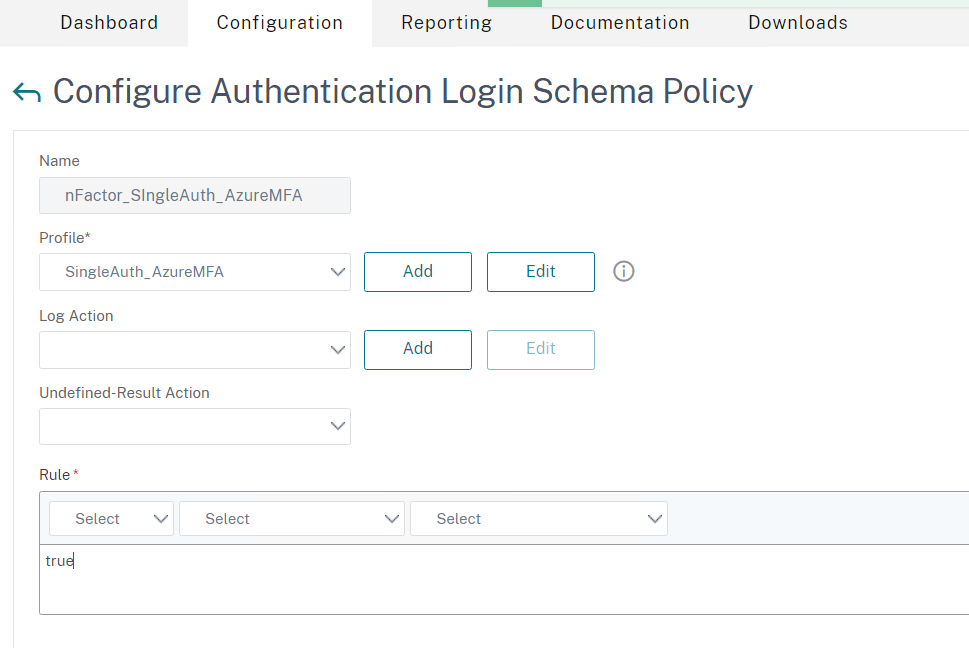
- Confirm the Login Schema Policy and Profile are created (you can switch between the tabs)
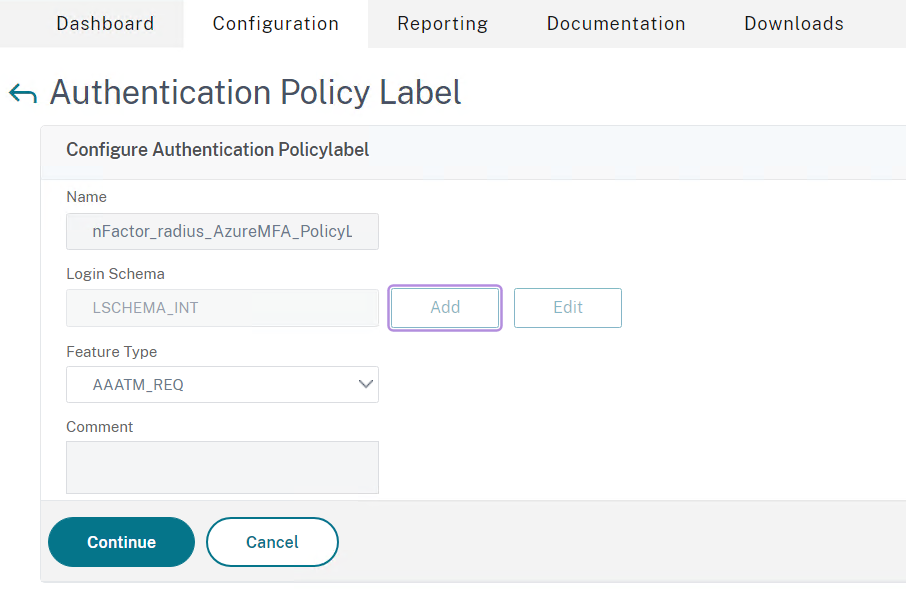
Create a Policy Label
- Go to Security > AAA – Application Traffic > Policies > Authentication > Advanced Policies > Policy Label
- Click on Add to create an Authentication Policy Label

- Create a name for example nFactor_Radius_AzureMFA_PolicyLabel
- Click on Continue
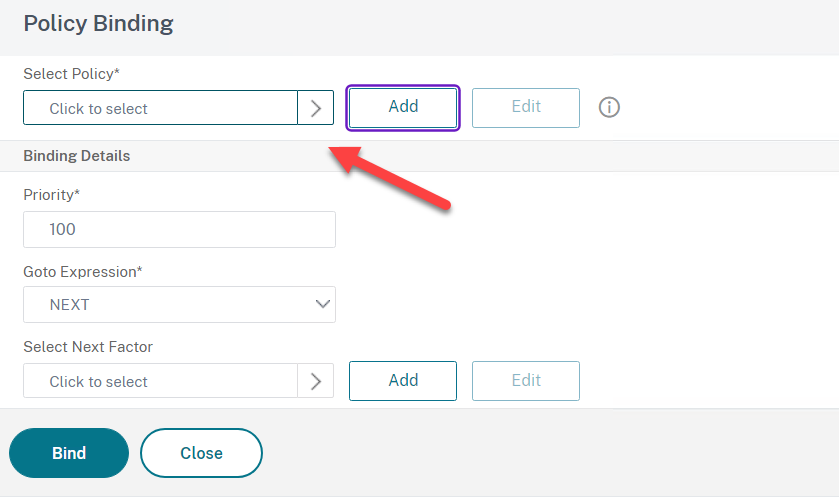
- Select the RADIUS Authentication Policy you created earlier

- Now Bind the PolicyLabel
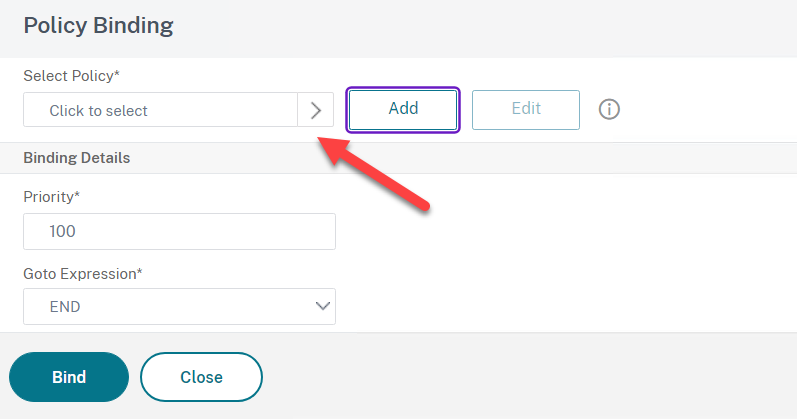
Assign Authentication Policy and Login Schema to the Authentication vServer
- Go to Security > AAA – Application Traffic > Virtual Servers
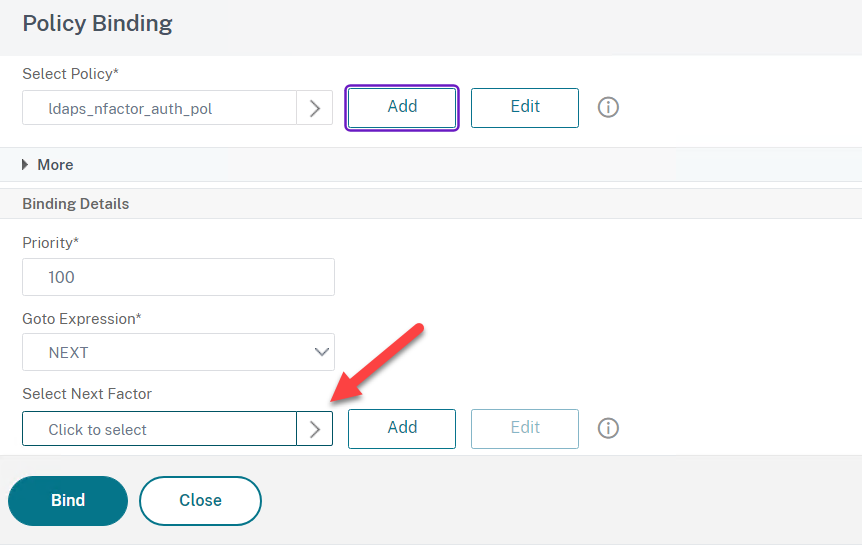
- Now click under Advanced Authentication Policy on No Authentication Policy

- Click on Select Policy
- Select the LDAP Policy

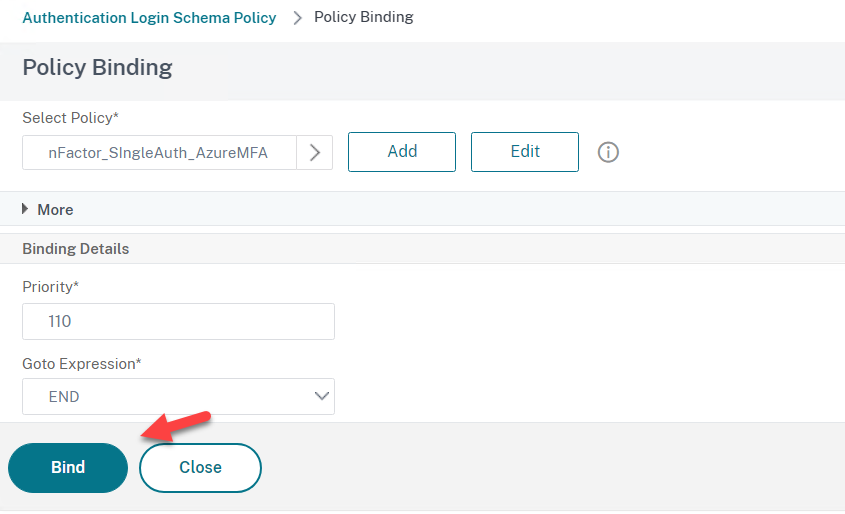
- Now for the Next Factor Select the RADIUS Policy Label
- Now assign the Login Schema you created earlier
- Click on + Login Schema

- Click on No Login Schema

- Click on Select Policy
- Select you Login Schema you created earlier and click on Bind
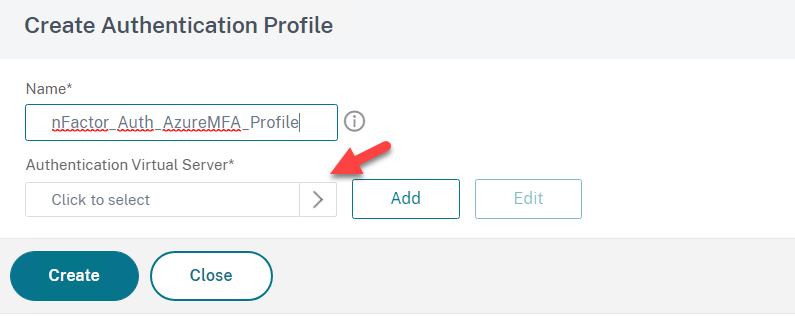
Create Authentication Profile and Assign to the Gateway
- Go to NetScaler Gateway > Virtual Servers > Edit your Gateway > Select Authentication Profile
- Click on + Authentication Profile

- Click on Add to create an Authentication Profile

- Create a name for example nFactor_Auth_AzureMFA_Profile
- Click on Select to add the Authentication Virtual Server and click on Create
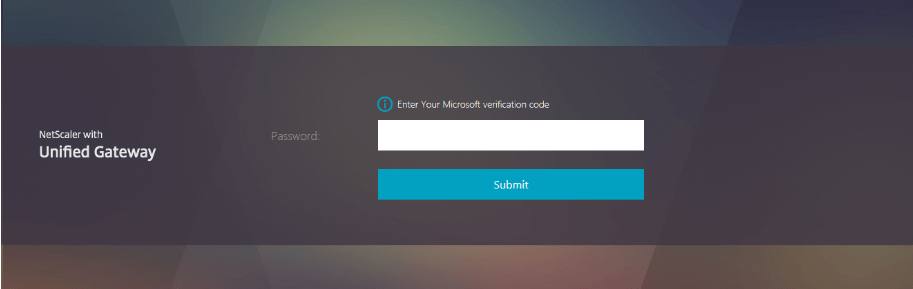
We have now configured a simple nFactor configuration for Microsoft MFA. You can also use this configuration for SMS/TEXT. If you use the Microsoft Authenticator App, you will get a prompt in the Microsoft Authenticator App you need to approve. If you use SMS/TEXT you will get an second screen for you confirmation. The nFactor authentication will be the same on the Workspace App.
That’s all folks!
Summary
I was able to make this configuration on trial and error and some digging on the internet (Credits to James Kindon). This is probably not the most complex configuration you can build, but it works for the needs of the customer where I build this. Maybe nice to know you can also use a simplified way using the nFactor Visualizer. I hope you can use this for your advantage. If you have any questions, please let me know.