There are several ways to deploy Office 365 or Microsoft 365 Apps to the users in your organization. It all depends on which version you purchase. In this case, we will focus on the installation of Microsoft 365 Apps (formaly known as Office 365 ProPlus) . To install this on Citrix, you need some additional settings in de configuration.xml, so beware of that.
Which update channel you will use for the installation all depends on the environment. For instance, if you have a Citrix environment, but also users who work on fat-clients (laptops), the logical choice would be to use the current release channel. In most situations, the fat client has the current channel release installed.
Readiness Toolkit
If you are not sure if your environment is ready for the move to Microsoft 365 Apps, you can use the Readiness Toolkit to assess application compatibility for Microsoft 365 Apps, You can download the tool in the Microsoft Download Center.
Here are the general steps to deploy Microsoft 365 Apps and Visio
- Purchase a license that supports sharedcomputerlicensing, with enough licenses for all of your users who work on the Citrix environment. For users who work on local machines, you can buy a different and may be less expensive subscription
- Sign in to the Microsoft 365 admin center and assign licenses for Microsoft 365 Apps to the users
If you want to have more control over how the subscription version of Microsoft 365 Apps is deployed, you can do the following:
- Download the Office Deployment Tool from the Microsoft Download Center.
- Create a configuration.xml file to use with the Office Deployment Tool to download and install the subscription version of Microsoft 365.
- Use the Office Deployment Tool to deploy the subscription version of Microsoft 365 to the users in your organization.
Create a share on the file server
To deploy Microsoft365 Apps, you need to have a shared folder, for the installation files, configuration.xml, and log files.
- Create a shared folder (e.g. MSOffice365Citrix)
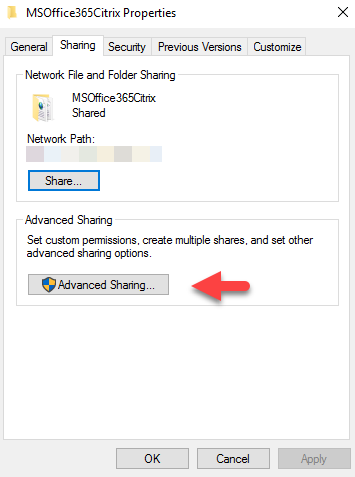
- Right-click the shared folder and select Properties
- Click on Advanced Sharing..
- Check the box Share this folder
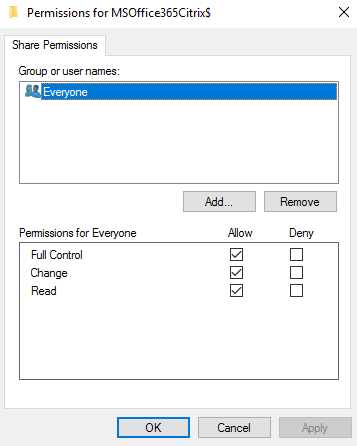
- Click on Permissions
- Set the share permissions, check the box Full Control
- Create the following files and folders in the shared folder:
- Office (will be created automatically, if the folder doesn’t exist)
- Updates
- Logging
- Create file download.bat
- “\\<SHARENAME>\MSOffice365Citrix$\setup.exe” /download “\\<SHARENAME>\MSOffice365Citrix$\configuration.xml “
- Create file Install.bat
- “\\<SHARENAME>\MSOffice365Citrix$\setup.exe” /configure “\\<SHARENAME>\MSOffice365Citrix$\configuration.xml “
- Create file update.bat (create this file only, if you do not use the current release!)
- “\\<SHARENAME>\setup.exe” /download “\\<sharename>\MSOffice365Citrix$\Updates\configuration.xml”
- Upload the installation files you downloaded from the deployment toolkit to the shared folder
Configuring the configuration.xml
You can create your configuration.xml file if you like, using the new Office Customization Tool for Click-to-Run. If you are more experienced, you can also adjust and use the example XML file. I will provide some steps, using the Office Customization Tool for Click-to-Run.
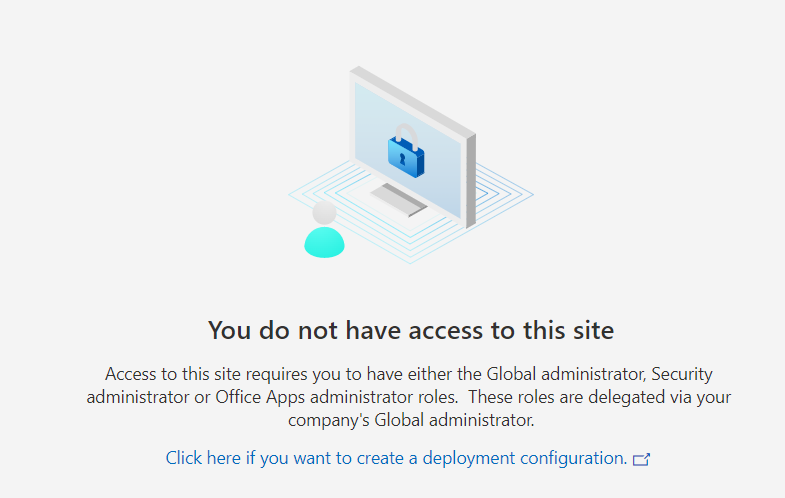
- Login Microsoft 365 Apps admin center
- Click on Click here if you want to create a Deployment Configuration (you don’t need to be a Global Admin or have any roles to use the Tool)
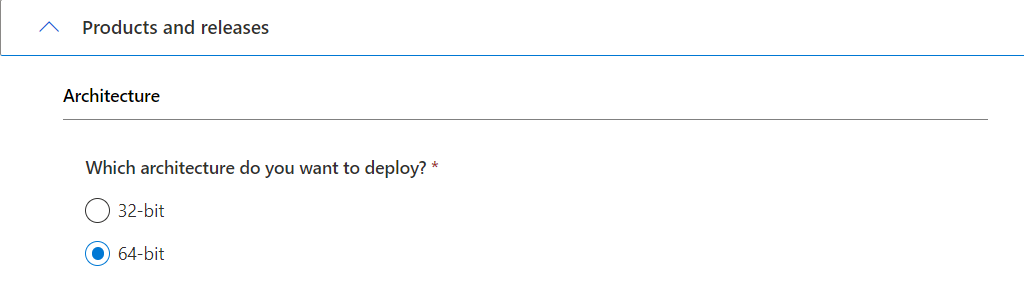
- Select which architecture do you want to deploy?
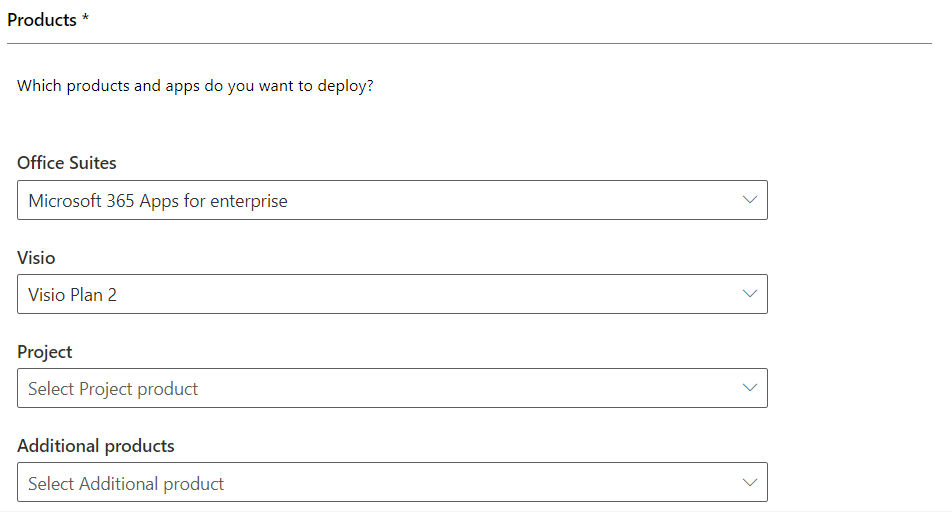
- Select which products and apps do you want to deploy?
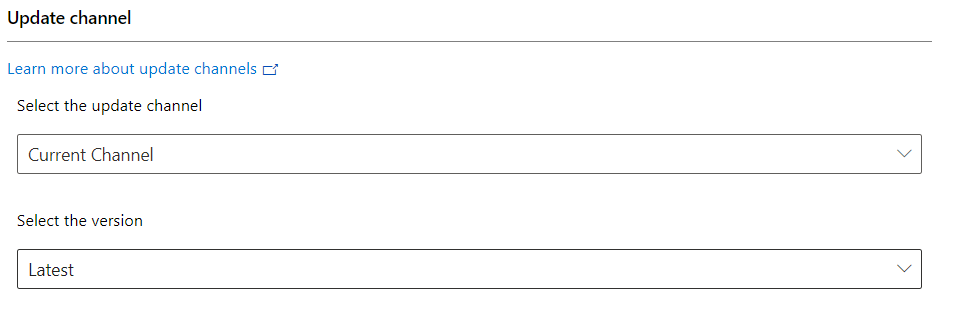
- Select the Update channel
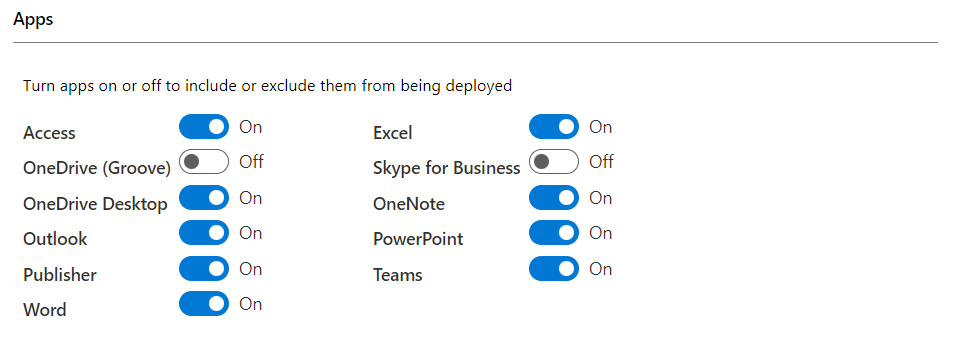
- Select the Apps you would like to install
- Select features and click Next

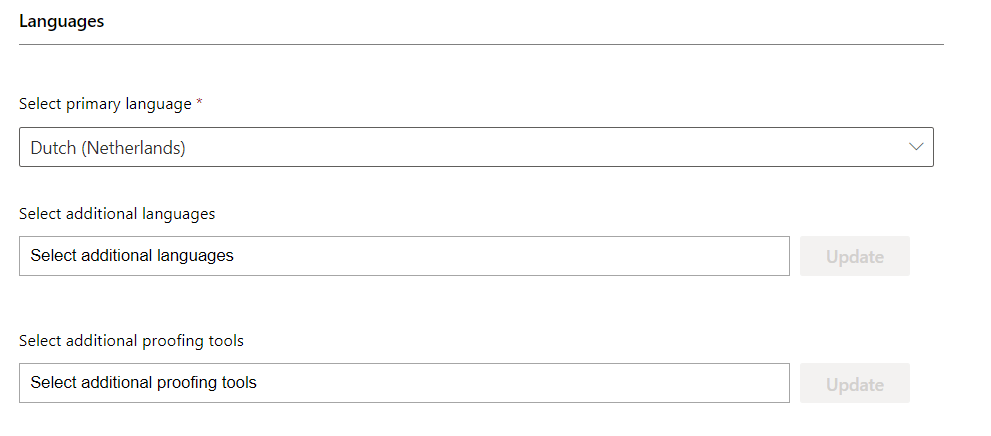
- Select the language and proofing tools
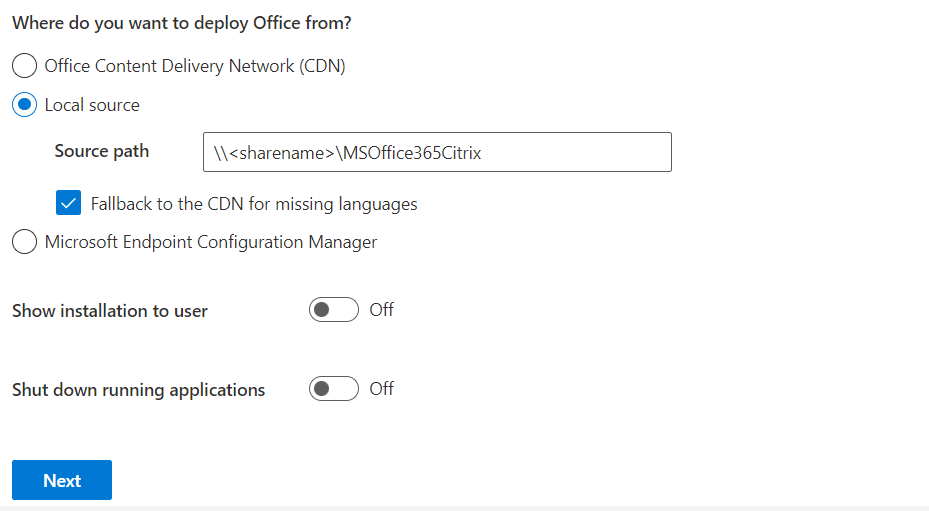
- Select where you want to deploy Office from?
- Check the box for Fallback to the CDN for missing languages
- Starting with version 1706 of System Center Configuration Manager a new option is available allowing administrators to enable clients to fall back to the Microsoft Office CDN when deploying Office 365 ProPlus updates to client machines. With this option enabled, clients will first check their available distribution points for the specified update. If the update cannot be found the client will then get the specified update directly from the Microsoft Office CDN
- Click Next
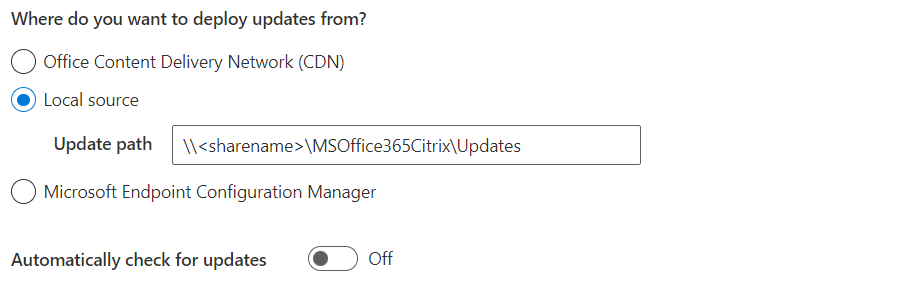
- Select where you want to deploy updates from?
If you are using the SemiAnnual, you need to add theupdate path. If you are using the Current Channel, then check the box Office Content Deliver Network (CDN)
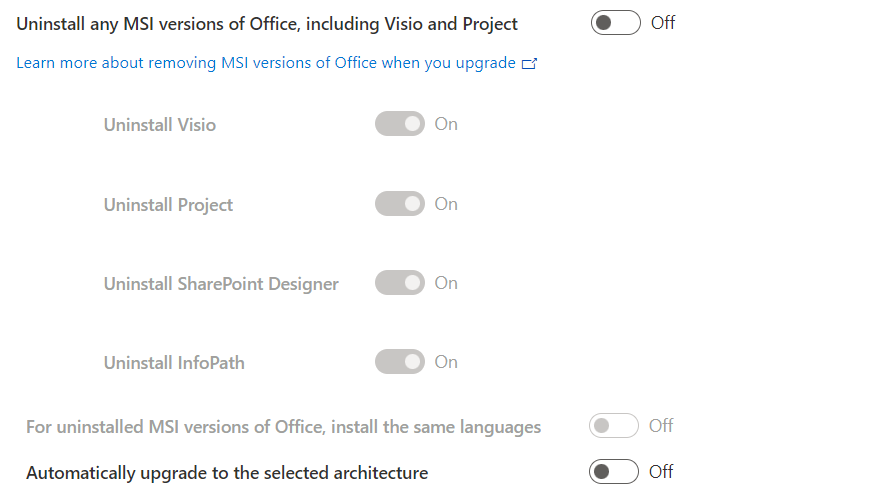
- Select preferred upgrade options
My advise is to run the Office Cleanup Utility, to remove all Office previous Office installations, you can download Uninstall Office automatically here.
- Disable Uninstall any MSI versions of Office, including Visio and Project
- Click Next
- Select Automatically accept the EULA
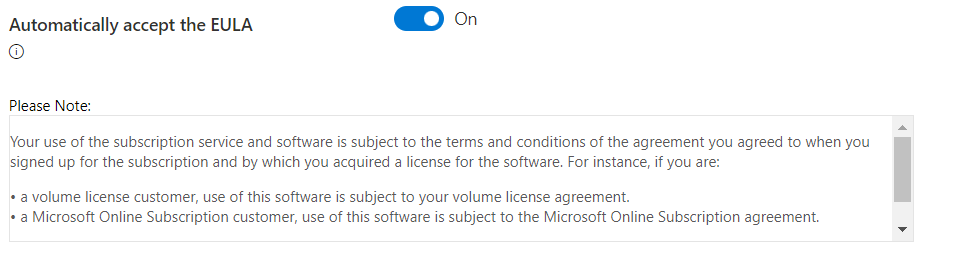
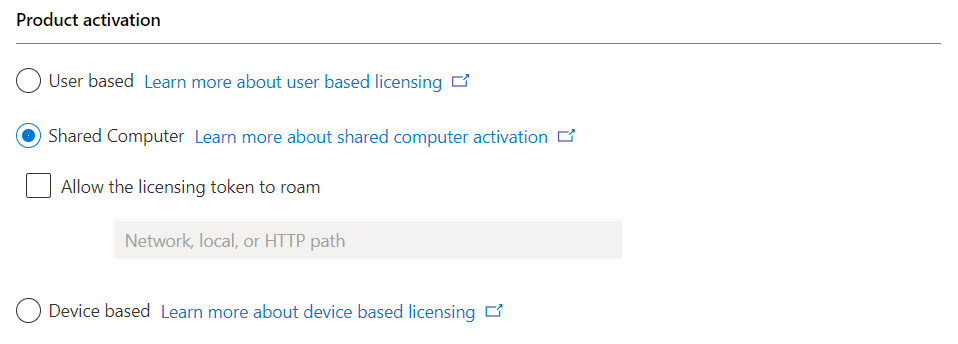
- Check the box Shared Computer, for Citrix Virtual Apps and Desktop (CVAD) deployments
- This will set the registry key sharedcomputerlicensing with value1
- Click Next
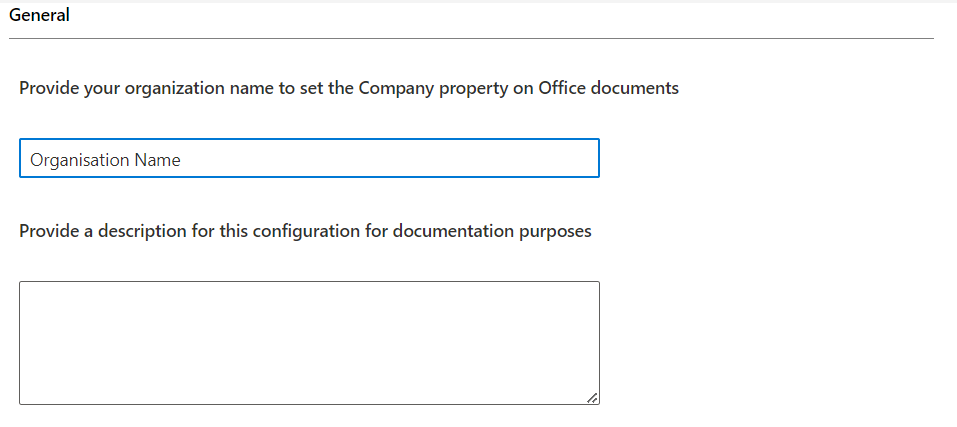
- Optional: Provide the comapny name in the General settings if you like
- The company name will set the Company property on Office documents and a description for this configuration for documentation purposes
- Click Next
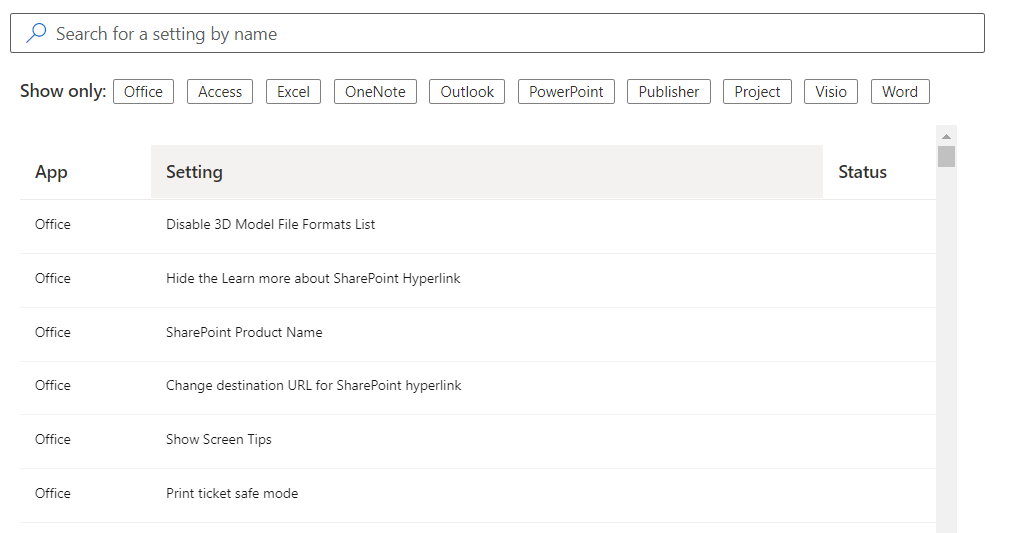
- Set theApplication preferences you need
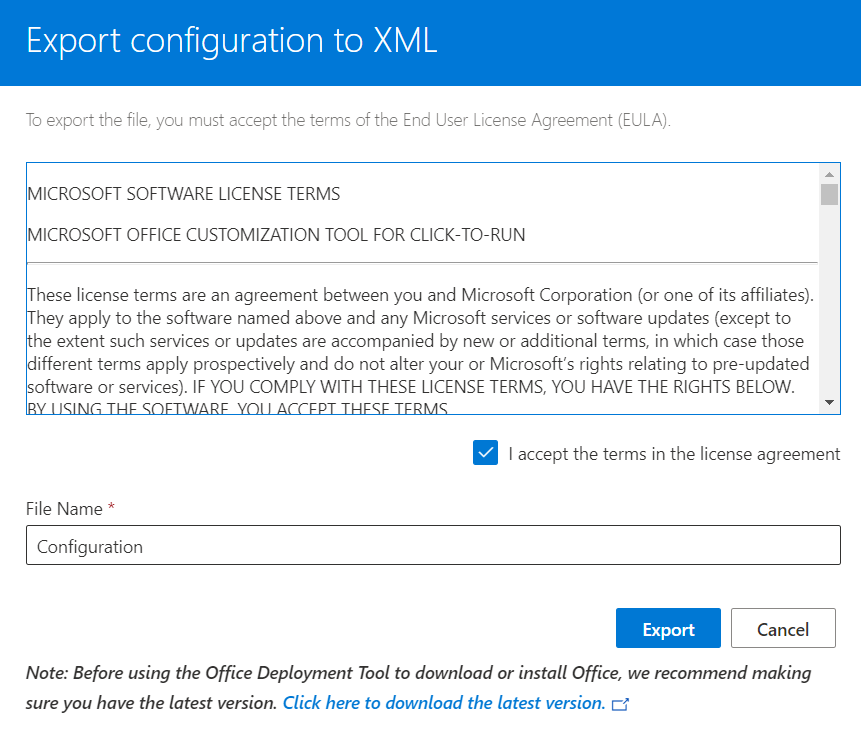
- Click on Finish if you are all setup for the export
- Now click on Export to export the settings and create an XML file
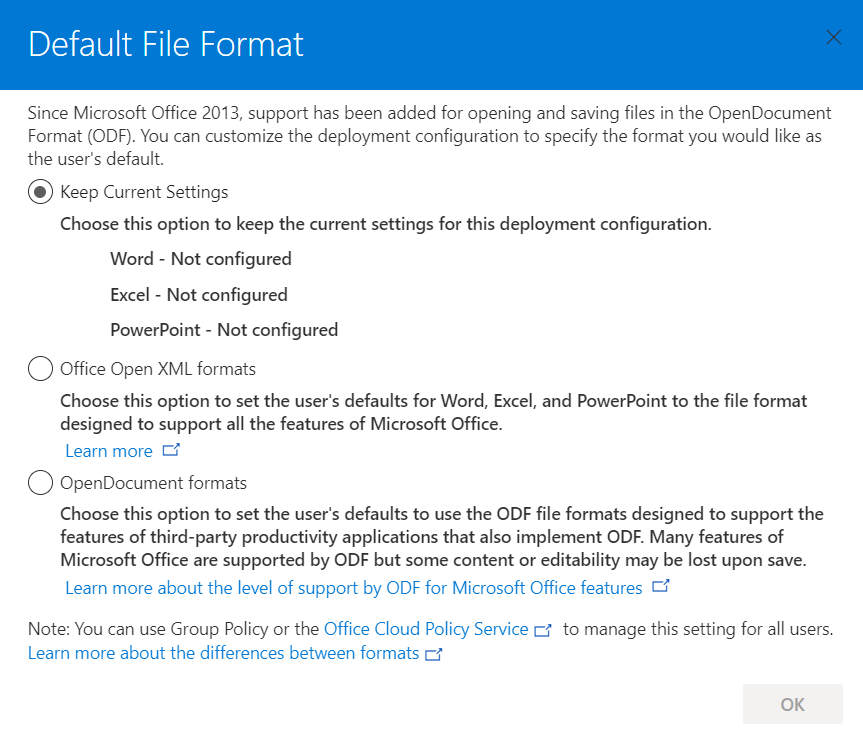
- Check the box Keep Current Settings
- Accept the License Agreement
- Upload the exported configuration.xml file to the shared folder
- Additionally you must add the path for the logfiles. Place this at the bottom of the configuration.xml file
<Logging Path="\\<sharename>\MSOffice365Citrix$\Logging" />
Example XML
<Configuration ID="a9064332-aefb-4a99-981a-a3af09662ebb">
  <Add OfficeClientEdition="64" Channel="Current" SourcePath="\\<sharename>\MSOffice365Citrix$" AllowCdnFallback="TRUE">
    <Product ID="O365ProPlusRetail">
      <Language ID="nl-nl" />
      <Language ID="en-us" />
      <ExcludeApp ID="Groove" />
      <ExcludeApp ID="Lync" />
      <ExcludeApp ID="Bing" />
      <ExcludeApp ID="Bing" />
    </Product>
    <Product ID="VisioProRetail">
      <Language ID="nl-nl" />
      <Language ID="en-us" />
      <ExcludeApp ID="Groove" />
      <ExcludeApp ID="Lync" />
      <ExcludeApp ID="Bing" />
      <ExcludeApp ID="Bing" />
    </Product>
    <Product ID="ProofingTools">
      <Language ID="nl-nl" />
      <Language ID="en-us" />
    </Product>
  </Add>
  <Property Name="SharedComputerLicensing" Value="1" />
  <Property Name="FORCEAPPSHUTDOWN" Value="FALSE" />
  <Property Name="DeviceBasedLicensing" Value="0" />
  <Property Name="SCLCacheOverride" Value="0" />
  <Updates Enabled="FALSE" UpdatePath="\\<sharename>\MSOffice365Citrix$\Updates" />
  <User Key="software\microsoft\office\16.0\excel\options" Name="defaultformat" Value="51" Type="REG_DWORD" App="excel16" Id="L_SaveExcelfilesas" />
  <User Key="software\microsoft\office\16.0\powerpoint\options" Name="defaultformat" Value="27" Type="REG_DWORD" App="ppt16" Id="L_SavePowerPointfilesas" />
  <User Key="software\microsoft\office\16.0\word\options" Name="defaultformat" Value="" Type="REG_SZ" App="word16" Id="L_SaveWordfilesas" />
  <AppSettings>
    <Setup Name="Company" Value="Organisation Name" />
  </AppSettings>
  <Display Level="None" AcceptEULA="TRUE" />
 <Logging Path="\\<sharename>\MSOffice365Citrix$\Logging" />
</Configuration>
Download Microsoft Apps and Visio
Now we are ready to download the data files into the download folder we created earlier, using the download.bat file.
- Right-click the download.bat file and run as Administrator
This will open the command prompt and starts downloading the data files. When the download is ready, the command prompt windows will close automatically. If you have trouble downloading the data, check the logfiles in the Logging folder you created earlier.
Tip: If the command prompt window closes imidiately after you start the download and there is no download data, there is proberbly something wrong with the configuration.xml.
Installation on Citrix
Once Microsoft 365 Apps and Visio are downloaded, we can proceed with the installation on Citrix. I’m not going into the process of how to install an application onto the Citrix image (Golden Image). If you do not know how to do this, follow this article if you use MCS. For Citrix Provisioning Services, follow this article.
- Login onto the maintenance server for your Citrix environment
- Navigate to the earlier created shared folder
- Right-click on the file Install.bat and run as Administrator
- After installation, seal the Citrix image and promote to test or production
Update Microsoft 365
There a several ways you can update the Microsoft Apps and Visio installations. Earlier we created the Update folder, this path will also be set in the registry for Office.
- Repeat the proces to update/install applications on the Citrix image
- To update Office you need to set the following registry key:
- HKEY_LOCAL_MACHINE\SOFTWARE\Microsoft\Office\ClickToRun\Configuration
- UpdatesEnabled
- set value True
- Right-click Updates.bat located on the shared folder and download the latest updates
- Update Office
Group Policy for Microsoft 365 Apps and Visio
If you want to specify and maintain certain user settings, you can download the Group Policy Administrative Template files (ADMX/ADML) for Office and use them to configure Group Policy settings. Group Policy can be used only with devices joined to a domain.
Tip: Disable Office Updates on your production environment by creating the following registry key: (link this GPO to the OU of you Citrix production and test servers)
- HKEY_LOCAL_MACHINE\SOFTWARE\Microsoft\Office\ClickToRun\Configuration
- UpdatesEnabled
- REG_SZ value False

Summary
You now have configured and installed Microsoft 365 and Visio on Citrix. How to install and configure Office caching for FSLogix will be a different post, you can follow the installation steps here. I hope I was able to provide some useful steps. If you have any questions, please let me know.
will love to read more from you, thank you
Thanks!