At the moment I’m working on a VMware upgrade. This customer is still working on version “vSphere Client version 6.5.0.38000”. ESXi 6.5 and 6.7 are end of support on 15 October 2022. The end of Technical Guidance for VMware ESXi 6.5 and 6.7 as of November 15, 2023.

Important! Please follow this knowledge base article “ESXi tracking filter not available” error when consolidating snapshots (81397)“, that can occur after an upgrade to 7.0U3h. This is a known issue affecting VMware ESXi 7.0 Update 1. Currently, there is no resolution in patch releases.
So, if you have any customers who are still working on this version, you need to start upgrading asap. To make this easy for you, I wanted to share the steps you need to take to upgrade the VMware environment. VMware vCenter Server 7.0 Update 3h Release Notes.
New with vSphere 7.0.x
vSphere Clustering Service (vCLS) provides a mechanism that allows VMware to decouple both vSphere DRS and vSphere HA from vCenter Server, creating a control plane for clustering services. By decoupling the clustering services (DRS and HA) from the vCenter Server via vCLS, VMware can ensure the availability of critical services even when vCenter Server VM is impacted by a failure.
The vCLS control plane consist of a maximum of 3 virtual machines (vCLS), also referred to as system or agents VM which are automatically deployed and placed on separate hosts in the cluster. The agent VMs are managed by vSphere Cluster Services. Users are not expected to maintain the lifecycle or state for the agent VMs.
There are three health states for the cluster services:
- Healthy – The vCLS health is green when at least 1 agent VM is running in the cluster. To maintain agent VM availability, there is a cluster quorum of 3 agents VMs deployed.
- Degraded – This is a transient state when at least 1 of the agent VMs is not available but DRS has not skipped its logic due to the unavailability of agent VMs. The cluster could be in this state when either vCLS VMs are being re-deployed or getting powered-on after some impact to the running VMs.
- Unhealthy – A vCLS unhealthy state happens when a next run of the DRS logic (workload placement or balancing operation) skips due to the vCLS control-plane not being available (at least 1 agent VM).
Use the following procedure to upgrade to VMware vCenter Server Appliance 7.0U3h from VMware vCenter Server Appliance 6.5.x. using the GUI.
Pre-check the VMware Environment
Always check If there is sufficient memory on the ESXi hosts, to take one host down and move all the VMs to the other hosts. if you do not have sufficient memory, you cannot perform the upgrade during business hours. Another fact with insufficient memory is that you do not have N + 1. So, in case, an ESXi host goes down, there is not enough space to move the VMs. This will cause a lot of possible downtimes. You need to fix this.
VMware Compatibility Guide
First we need to check the compatibility matrix, to see if the storage and network adapter are compatible. You can find the VMware Compatibility Guide here.
- Log into vSphere Client
- To check the storage adapter, select an ESXi host in the Cluster
- Click on Configure and select Storage Adapters

- Now copy the storage adapter model “Emulex LightPulse LPe32000 PCIe Fibre Channel Adapter”
- Browse to the VMware Compatiblity Guide
- Select the dropdown menu for All Listings and click on IO Devices and search for the copied storage driver

Found 1 result.
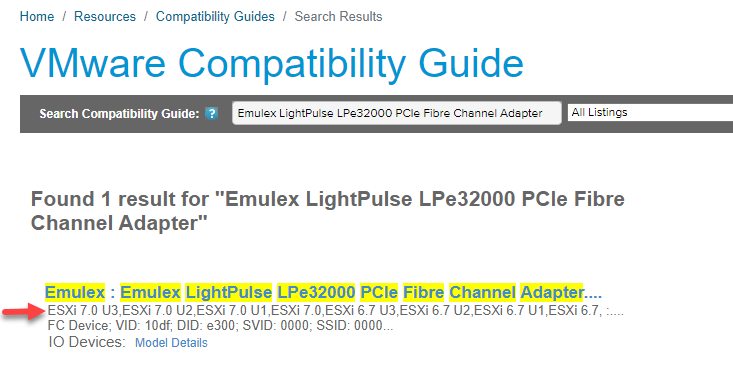
- Now click on the results to get more details

As you can see the storage adapter is compatible. Now we will repeat the steps for the network adapter.
- To check the network adapter, select an ESXi host in the Cluster
- Click on Configure and select Physical Adapter

- Repeat the same steps as for the storage adapter
vSphere Upgrade
The VMware environment has a couple of components we need to upgrade.
- vCenter Appliance
- ESXi hosts
In this case, the vCenter Appliance is not domain joined. From a security perspective, this is the best setup for VMware. For more information on this, read this article Join or Leave an Active Directory Domain.
First we will update the vCenter Appliance.
- Log into VMware Connect and download the vCenter ISO
- Go to Products and Accounts -> Products -> My Products
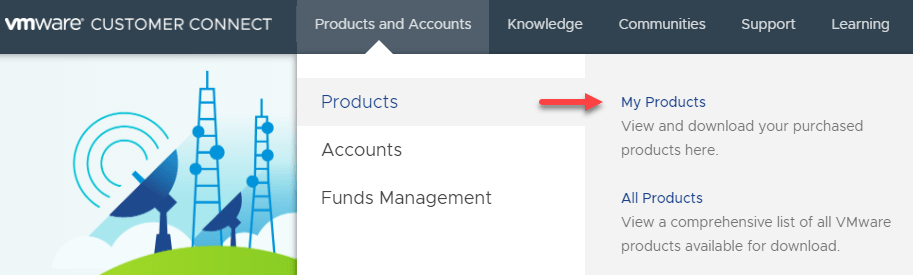
- Click on download for the vCenter ISO

- Select Version 7.0

- Download the ISO file for vCenter from the product you want to upgrade

Tip! if you are not sure which product version you have, go to Products and Accounts -> Accounts -> Licenses and check which license you have. Also pre-check if you can upgrade the license file, by selecting Show Upgradable Products. How to activate vCenter will be explained later on.

Upgrade – Stage 1: Deploy vCenter Server
- Before you begin, create a snapshot of the source vCenter server VM, this way you can rollback easily if something goes wrong
- Mount the ISO: VMware-VCSA-all-7.0.3-20395099.iso
- Right-click on the ISO and select Mount
- Go to D:\vcsa-ui-installer\win32\installer.exe
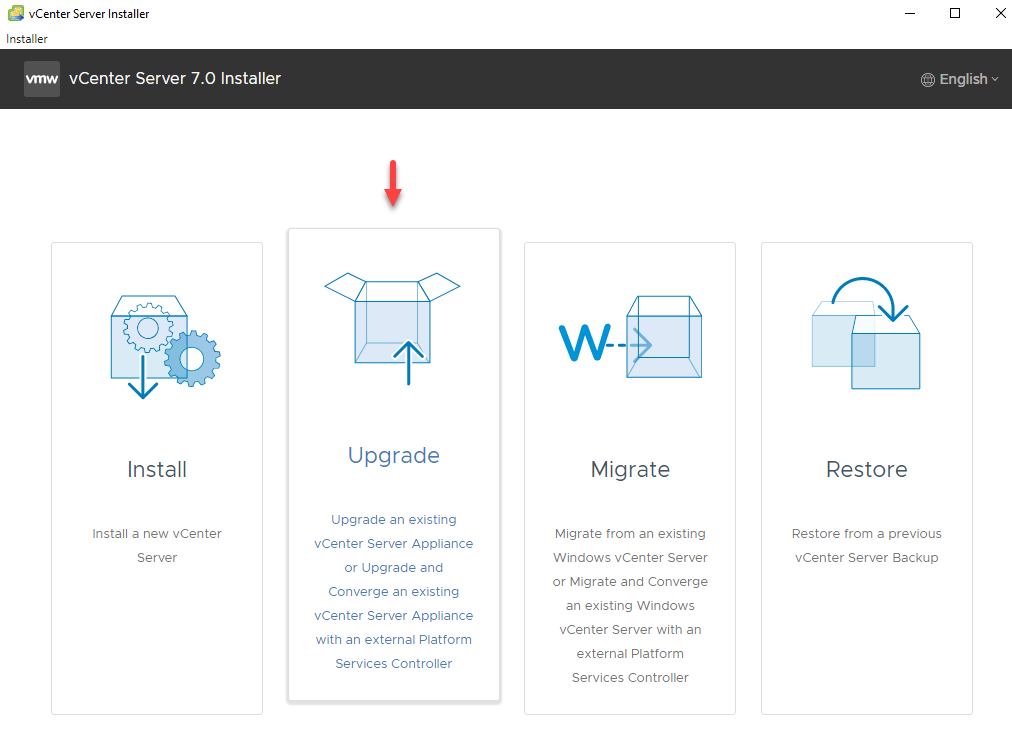
- Click on Upgrade and click NEXT
- Accept the End user license agreement and click NEXT
Connect to Source Appliance.
- Enter the FQDN or IP Address for the Source Appliance and Connect to Source
- SSO User Name administrator@vsphere.local
- SSO Password xxxxxxxx
- Appliance (OS) root password xxxxxxxxx
- Enter the FQDN or IP Address for the ESXi host
- User name root
- Password xxxxxxxx
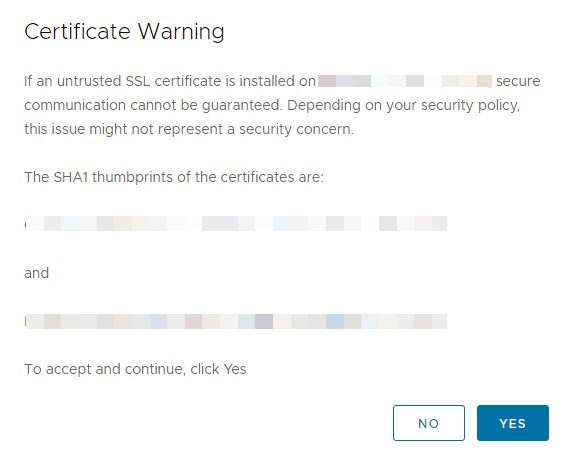
- Click on NEXT and accept the Certificate Warning

vCenter Server Deployment Target.
- Enter the FQDN or IP Address for the ESXi host
- User Name root
- Password xxxxxxxx
- Click on NEXT and accept the Certificate Warning
Set Up Target vCenter Server VM.
- VM Name VC01
- Set root password xxxxxxxxx (this will be the new root password)
- Confirm root password xxxxxxxxx
Select Deployment Size
- Deployment Size Tiny (this will depend on the environment)
- Storage Size Default
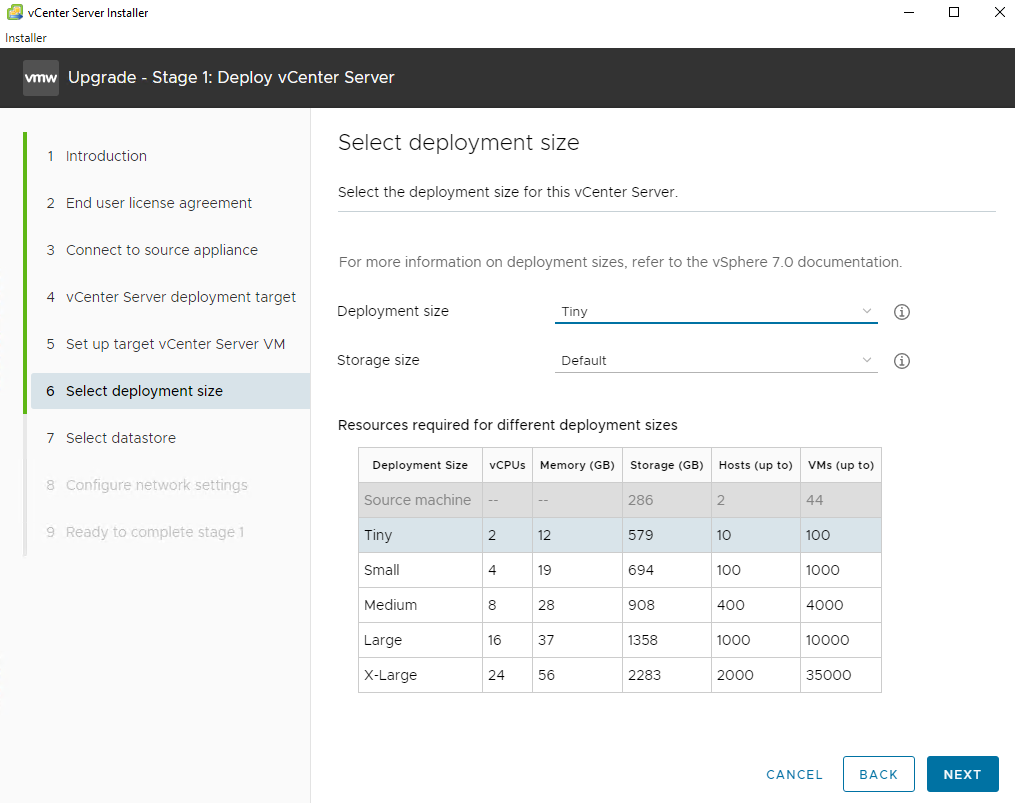
- Click NEXT
- Select Datastore (any datastore that has the most free space)
- Enable Thin Disk Mode checkbox

Configure Network Settings.
- Network (same network as source appliance)
- IP version IPv4
- IP Assignment static
- Temporary IP Address 10.x.xx.xx
- Subnet mask or prefix length 255.255.255.0 (in most cases)
- Default Gateway 10.x.xx.xx
- DNS servers 10.x.xx.xx
- Click on FINISH to complete Stage 1

At this stage the new vCenter Appliance is rolled out. The source vCenter Appliance is still operational.
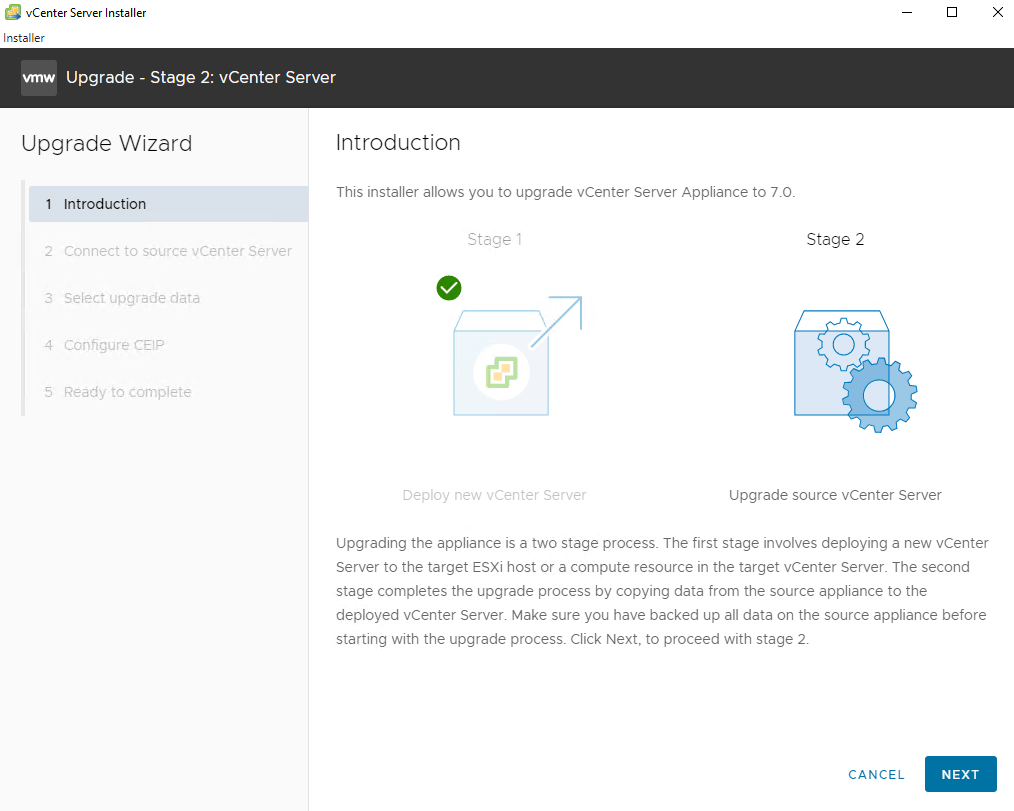
Upgrade – Stage 2: Deploy vCenter Server
We will now proceed with stage 2.
- Click NEXT to proceed the upgrade
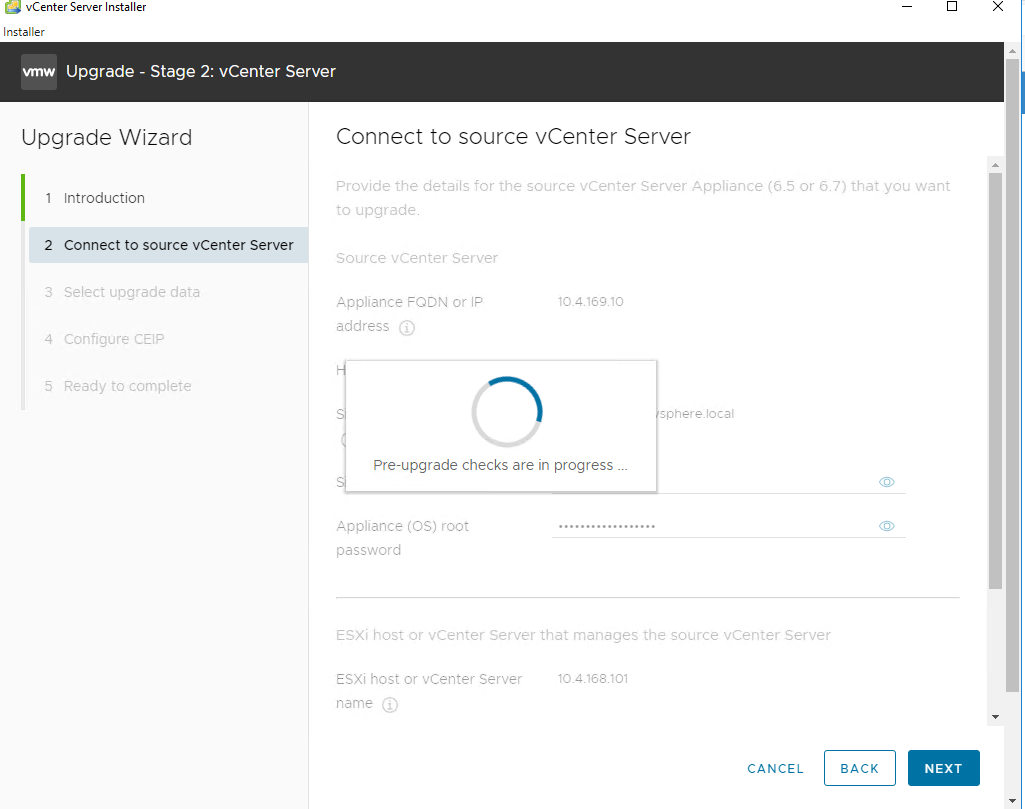
- Connect to the Source vCenter Server and run the pre-check
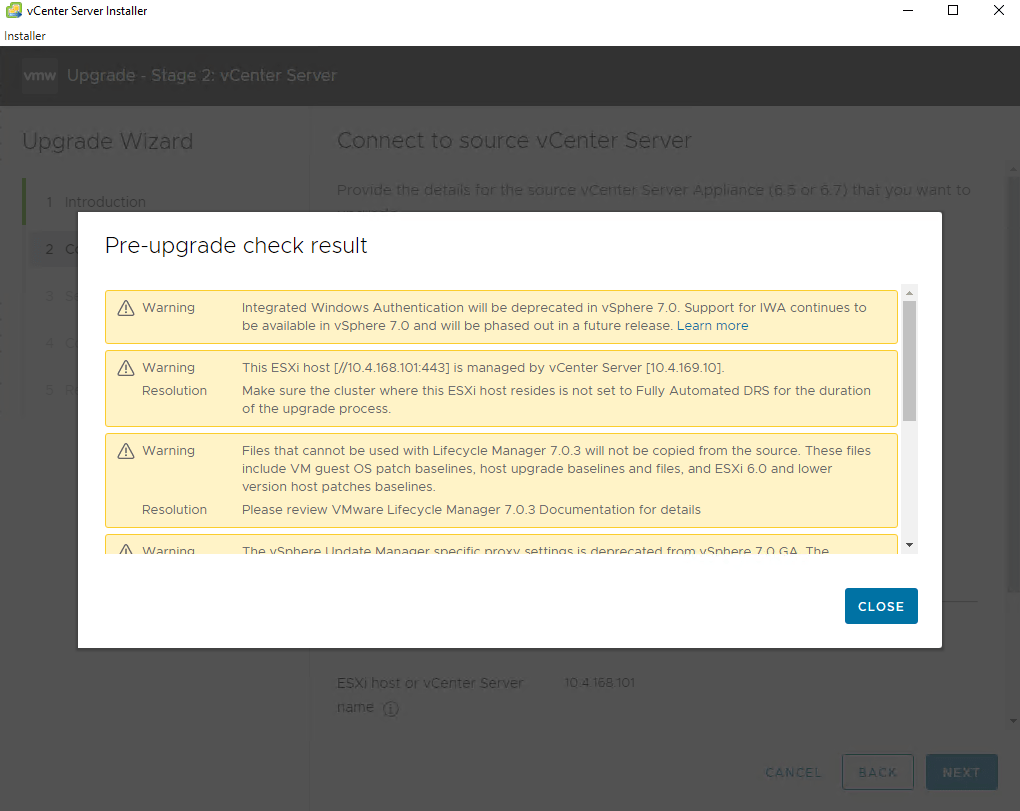
- Check the pre-upgrade result. If there are any warnings, you need to fix these warnings before you proceed, otherwise, the upgrade will fail
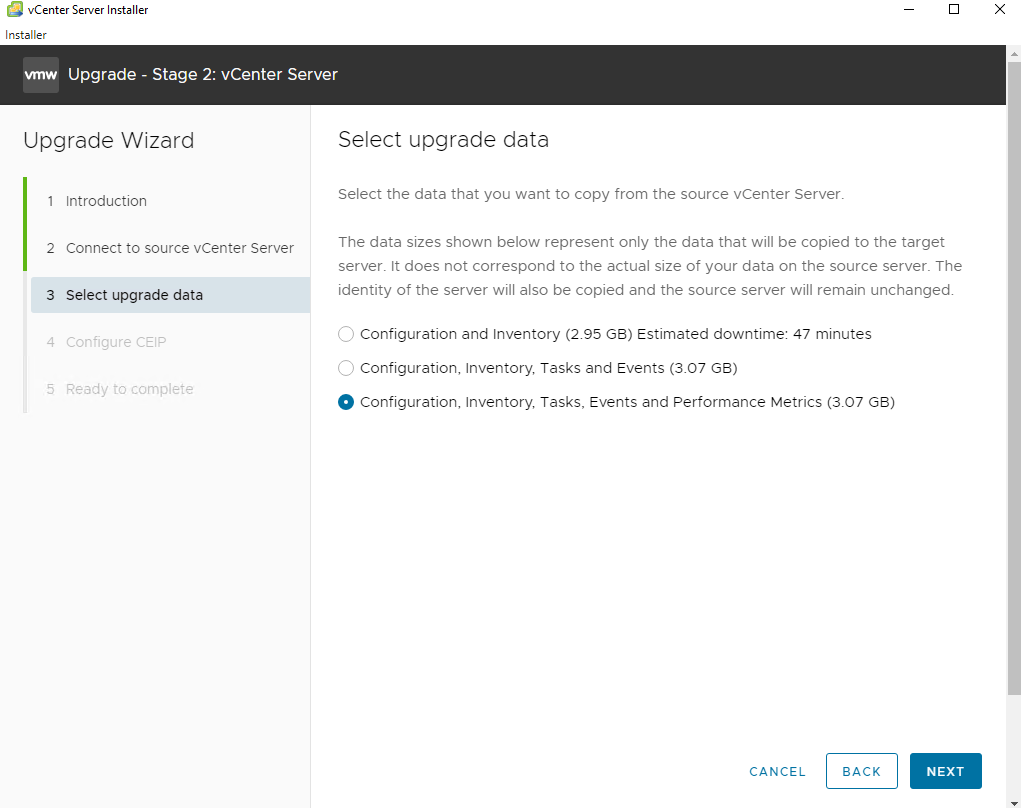
- We always select Configuration, Inventory, Tasks, Events and Performance Metrics
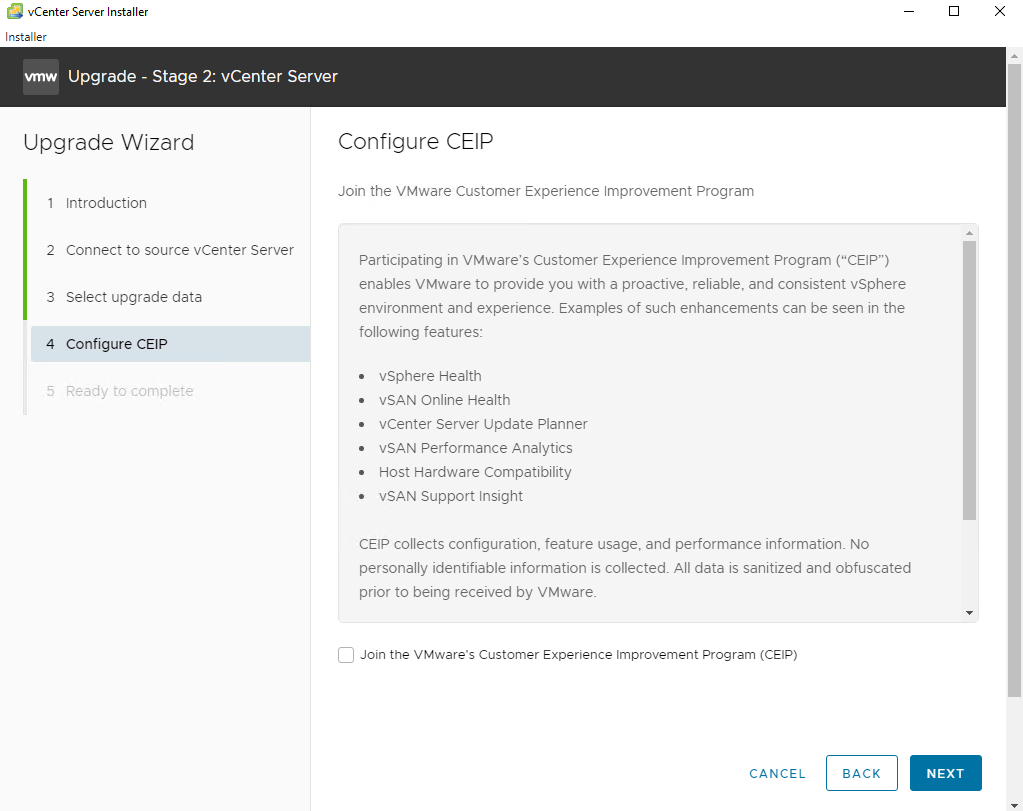
- Uncheck the checkbox to Join the VMware’s Customer Experience Improvement Program (CEIP)
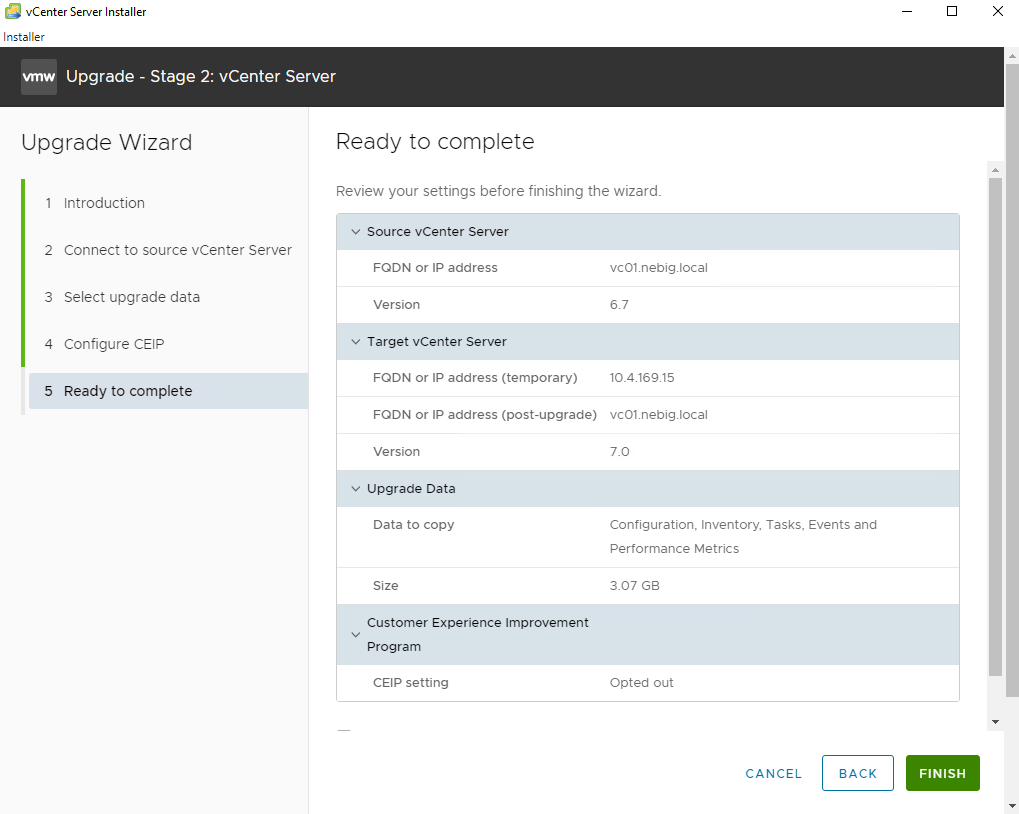
- Click NEXT
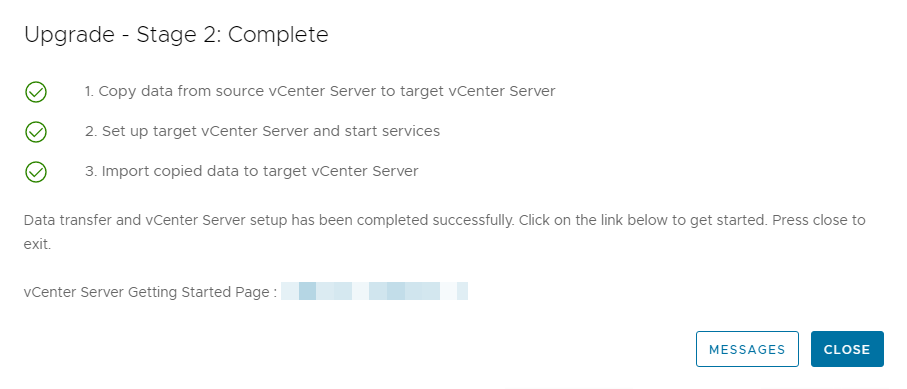
- Click FINISH to complete the upgrade
In this stage, all data will be copied from the current to the new appliance.
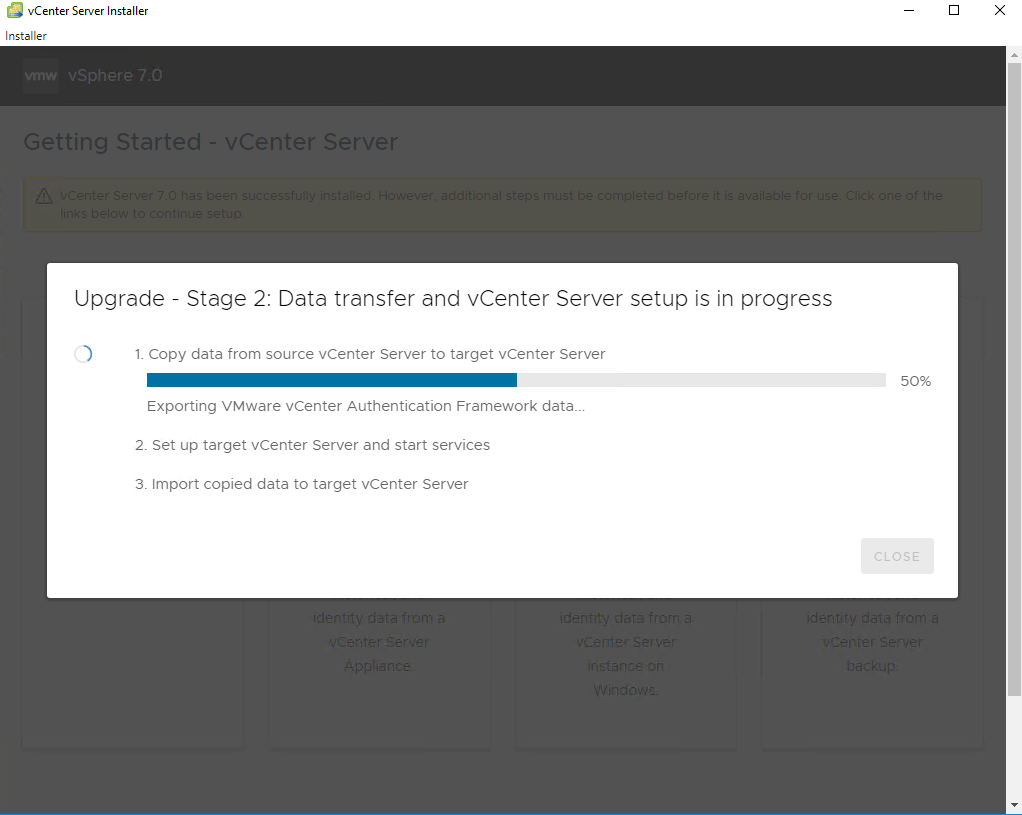
When completed the old vCenter Server will be shut down and the new appliance is in production.
Note: If the upgrade fails, you need to log in to the ESXi host and shut down and remove the new appliance. Then boot the old vCenter Server and you are up and running again (revert to the snapshot you took earlier if you have any issues). Now we need to address the issues and repeat the whole process!
Note: It is recommended to remove unneeded or dated baselines from vLCM once the upgrade to vSphere 7.0U3h has been completed.
Note: Regardless of whether the VUM database is migrated during the VCSA upgrade procedure, a new baseline to upgrade and patch ESXi hosts to 7.0 is required.
Upgrade vCenter Appliance using CLI
If you prefer scripting and want some more challenges when upgrading the vCenter Appliance, you can also use CLI. VMware already provides an example .json template in the vCenter ISO. I prefer to use CLI because this gives you more insights into the upgrade process. But this is really a personal preference.
- Go to E:\vcsa-cli-installer\templates\upgrade\vcsa6.5\vCSA_on_ESXi.json
Example .json
{
    "__version": "2.13.0",
    "__comments": "Sample template to upgrade a vCenter Server Appliance 6.7 with an embedded Platform Services Controller to a vCenter Server Appliance 7.0 with an embedded Platform Services Controller.",
    "new_vcsa": {
        "esxi": {
            "hostname": "10.x.xx.xxx",
            "username": "root",
            "password": "xxxxxxxx",
            "deployment_network": "Servers",
            "datastore": "anydatastorewithsufficientstoragecapacity"
        },
        "appliance": {
            "__comments": [
                "You must provide the 'deployment_option' key with a value, which will affect the vCenter Server Appliance's configuration parameters, such as the vCenter Server Appliance's number of vCPUs, the memory size, the storage size, and the maximum numbers of ESXi hosts and VMs which can be managed. For a list of acceptable values, run the supported deployment sizes help, i.e. vcsa-deploy --supported-deployment-sizes"
            ],
            "thin_disk_mode": true,
            "deployment_option": "small",
            "name": "VC01"
        },
        "os": {
            "ssh_enable": false
        },
        "temporary_network": {
            "ip_family": "ipv4",
            "mode": "static",
            "ip": "10.x.xx.xx",
            "prefix": "24",
            "gateway": "10.x.xx.xx",
            "dns_servers": [
                "10.x.xx.xx"
            ]
        },
        "user_options": {
            "__comments": [
			    "Select the data that you want to copy from the source vCenter Server.",
				"'core' = 'Configuration and Inventory',",
				"'core_events_tasks' = 'Configuration, Inventory, Tasks and Events'",
				"'all' = 'Configuration Inventory, Tasks, Events and Performance Metrics'"
			],
            "vcdb_migrateSet": "all"
        }
    },
    "source_vc": {
        "description": {
            "__comments": [
                "This section describes the source appliance which you want to",
                "upgrade and the ESXi host on which the appliance is running. "
            ]
        },
        "managing_esxi_or_vc": {
            "hostname": "10.x.xx.xxx",
            "username": "root",
            "password": "xxxxxxxx"
        },
        "vc_vcsa": {
            "hostname": "10.x.xx.x",
            "username": "administrator@vsphere.local",
            "password": "xxxxxxxx",
            "root_password": "xxxxxxxx"
        }
    },
    "ceip": {
        "description": {
            "__comments": [
                "++++VMware Customer Experience Improvement Program (CEIP)++++",
                "VMware's Customer Experience Improvement Program (CEIP) ",
                "provides VMware with information that enables VMware to ",
                "improve its products and services, to fix problems, ",
                "and to advise you on how best to deploy and use our ",
                "products. As part of CEIP, VMware collects technical ",
                "information about your organization's use of VMware ",
                "products and services on a regular basis in association ",
                "with your organization's VMware license key(s). This ",
                "information does not personally identify any individual. ",
                "",
                "Additional information regarding the data collected ",
                "through CEIP and the purposes for which it is used by ",
                "VMware is set forth in the Trust & Assurance Center at ",
                "http://www.vmware.com/trustvmware/ceip.html . If you ",
                "prefer not to participate in VMware's CEIP for this ",
                "product, you should disable CEIP by setting ",
                "'ceip_enabled': false. You may join or leave VMware's ",
                "CEIP for this product at any time. Please confirm your ",
                "acknowledgement by passing in the parameter ",
                "--acknowledge-ceip in the command line.",
                "++++++++++++++++++++++++++++++++++++++++++++++++++++++++++++++"
            ]
        },
        "settings": {
            "ceip_enabled": true
        }
    }
}- Now we need to pre-check the upgrade and .json template
- Open an elevated command prompt (keep in mind you need to execute this script on a machine where all firewall ports are open for VMware)
- Navigate to the vcsa-cli-installer subdirectory for your operating system
- If you are running the upgrade on Windows, navigate to the vcsa-cli-installer\win32 directory
- If you are running the upgrade on Linux, navigate to the vcsa-cli-installer/lin64 directory
- If you are running the upgrade on Mac, navigate to the vcsa-cli-installer/mac directory
- Verify that you prepared the upgrade template correctly by running a basic template verification
- vcsa-deploy upgrade –verify-template-only path_to_the_json_file
- Gather and validate the upgrade requirements by running a pre-upgrade check
- vcsa-deploy upgrade –precheck-only path_to_the_json_file –accept-eula –acknowledge-ceip
- Perform the upgrade by running the following command
- vcsa-deploy upgrade –accept-eula –acknowledge-ceip path_to_the_json_file
And that’s it!
Summary
As you can see there are several ways to upgrade the vCenter Server. There is a nice post here from Vladan Seget if you want to explore all the options. Credits to Jacob van Rooijen, for showing me the way how to upgrade using CLI. How to upgrade ESXi hosts, will be another post. So, keep an eye out!